


.png?width=300&name=crl_purple_dots_bg_med%20(2).png)
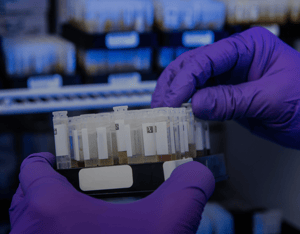
Blood Collection
CRL offers a comprehensive test menu ranging from routine laboratory services to the latest in molecular testing. We continually advance our test menu, provide customizations, and hold ourselves to the highest of quality and support standards, uniquely positioning our partners to achieve the best possible outcomes.
- Phlebotomy
- Additional Venipuncture Considerations
- Specimen Handling
Phlebotomy
- Wash hands thoroughly before beginning any phlebotomy procedure. Be sure to check expiration dates on tubes before proceeding. DO NOT USE EXPIRED TUBES.
- Confirm the identity of the patient by checking at least two identifiers before collecting the specimen(s). This can be done by asking the patient to state their full name and requesting to see the patient’s driver’s license to verify picture, name, date of birth and/or driver’s license number and documenting the information on the consent/chain of custody form.
- Explain the procedure, including small risk of hematoma, slight pain, and some light-headedness. Inquire whether the patient has a history of fainting or dizziness with phlebotomy procedures so that ammonia inhalants can be obtained if necessary. Explain that loss of vacuum or a collapsed vein may necessitate another draw.
- On a table or desk, assemble all necessary equipment: cotton balls and/or gauze, tubes, safety needle, alcohol swab, tourniquet, gloves, and band aid. Wearing safety gloves is MANDATORY. Wear additional protective equipment if contamination is expected. Safety needles should always be used; the only exception is if the patient is very hard to draw then a butterfly needle set may be used.
- Position the patient so that they are seated comfortably in a chair with their arm extended on an armrest, desk, or table to form a straight line from the shoulder to the wrist. The patient’s arm and elbow should be firmly supported, and not bent at the elbow.
- Check both arms to select the larger and fuller veins. Palpate and trace the path of the veins several times with your index finger. Tap the vein at the site of the draw with your index finger and second finger. This will cause the vein to dilate. The following factors should be considered in site selection:
- Extensive scarring. Healed burn areas or scar tissue should be avoided.
- Specimens collected from an area with a hematoma may yield erroneous test results. If another vein site is not available, the specimen should be collected distal to the hematoma.
- Apply the tourniquet.
- Ask the patient to open and close his/her fist so their veins become prominent. Vigorous hand pumping is not necessary to activate blood flow and should be avoided.
- Clean the venipuncture site with the alcohol swab in a circular motion from the center of the area to the outside. Allow the area to air-dry to prevent hemolysis and a burning sensation to the patient.
- Insert the stopper of the first tube to be drawn into the adaptor. Do not push too far to avoid premature loss of vacuum via puncture of the needle. The recommended order of draw when drawing more than one tube is as follows:
- Light blue stopper sodium citrate tube (coagulation testing)
- Plasma must be separated from cells within 45 minutes of venipuncture and centrifuged a second time before being placed in plastic transport tubes. Freeze within two (2) hours and keep frozen until testing is performed. To avoid delays in turnaround time when requesting multiple tests on frozen samples, please submit separate frozen specimens for each test requested.
- Red stopper no additive/gel tube (PCB testing)
- Fill tube completely.
- Allow tube to clot for 30 minutes at room temperature.
- Centrifuge clotted tube for ten (10) minutes at high speed.
- Transfer serum to green capped transfer tube (be careful not to transfer red blood cells)
- Discard red stopper tube after transfer
- Testing will not be performed on tubes received un-centrifuged or collected in Gel clot tube.
- Serum separator tube (SST) or serum tube (chemistry and immunology testing)
- Fill tube completely
- Gently invert five (5) to ten (10) times
- Allow tube to clot for thirty (30) minutes to one (1) hour at room temperature.
- Centrifuge clotted tube for fifteen (15) minutes at high speed.
- Transfer serum to red capped transfer tube (be careful not to transfer red blood cells)
- Discard SST tube after transfer.
- Testing will not be performed on tubes received un-centrifuged.
- Green top sodium heparin tube
- Mix tube thoroughly by gentle inversions eight (8) to ten (10) times immediately after blood is collected to prevent clotting.
- Avoid vigorous shaking to avoid hemolysis of cells.
- Do not centrifuge or transfer.
- Testing may not be able to be completed on tubes containing less than one (1) ml of blood.
- Royal blue (EDTA) tube (heavy metal testing)
- Use a royal blue top trace element K2 EDTA tube. Other royal blue top tubes may contain a different additive or no additive at all.
- Mix tube thoroughly by gentle inversions eight (8) to ten (10) times immediately after blood is collected to prevent clotting.
- Avoid vigorous shaking to avoid hemolysis of cells.
- Do not centrifuge or transfer.
- Testing may not be able to be completed on tubes containing less than one (1) ml of blood.
- If you do not have a royal blue EDTA, please collect using a lavender top (EDTA) tube and follow the same instructions as above.
- Lavender top (EDTA) tube (hematology testing)
- Mix tube thoroughly by gentle inversions eight (8) to ten (10) times immediately after blood is collected to prevent clotting.
- Avoid vigorous shaking to avoid hemolysis of cells.
- Do not centrifuge or transfer.
- Testing may not be able to be completed on tubes containing less than one (1) ml of blood.
- Light blue stopper sodium citrate tube (coagulation testing)
- Insert the needle into the vein with the bevel facing upward. Puncture the stopper on the tube by pushing it onto the end of the needle, and grasp the edge of the adaptor to provide stability once the blood flow has begun. Have the patient open his/her fist.
- Fill the tube until the vacuum is exhausted. Remove the tube from the adaptor and insert subsequent tubes. Be sure that all tubes are completely filled to ensure sufficient blood sample for laboratory analysis.
- Place a cotton ball or 2 x 2 square piece of gauze over the site. All used needles must be disposed of in a puncture proof biohazard receptacle. Never recap a needle. Recapping, purposeful bending, breaking, removing from disposable syringes, or other manual manipulations of needles is prohibited. Apply pressure to the site for 2-5 minutes. Place a band aid over the puncture site.
- Again verify that the information on the sample tubes match the consent/requisition form.
- Remove gloves and dispose of in a properly identified biohazard bag or container. Wash hands thoroughly after phlebotomy.
Additional Venipuncture Considerations
1. Prevention of hematoma:
- Puncture only the uppermost wall of the vein
- Release the tourniquet before removing the needle from the vein.
- Use only major veins; not superficial veins
- Make sure that the needle fully penetrates the uppermost wall of the vein. Partial penetration may allow blood to leak into the soft tissue surrounding the vein by way of the needle bevel.
- Apply a small amount of pressure to the area with the cotton ball or gauze pad when bandaging the arm.
2. Prevention of hemolysis:
- Mix anti-coagulated specimens thoroughly by inverting each tube gently eight (8) to ten (10 times). Do not shake. Vigorous mixing may cause hemolysis.
- Avoid drawing blood from an area with a hematoma.
- Ascertain that the venipuncture site is dry without touching it.
3. If a blood sample is unobtainable:
- Change the position of the needle. If the needle has penetrated too far into the vein, pull it back slightly. If it has not penetrated far enough, advance it farther into the vein. Rotate the needle a half-turn.
- Try another tube; the tube may not have sufficient vacuum.
- Loosen the tourniquet. It may be applied too tightly, thereby stopping the blood flow. Reapply the tourniquet loosely. This procedure can be accomplished easily when using the velcro-type tourniquet by releasing it and quickly pressing it together again.
- Probing for the vein is NOT recommended as it is painful to the patient. In most cases, another puncture in a site below the first site is advised
- Never attempt a venipuncture more than twice. Have another person attempt to draw the specimen.
Specimen Handling
1. Some other factors that can affect the sample are:
- Hemolysis is defined as the breaking down of red blood cells. This can be slight, moderate or severe. The three (3) causes of hemolysis are TIME, TEMPERATURE AND TRAUMA.
- TIME: Holding blood over two (2) hours before centrifuging can and usually does cause some hemolysis. Allow at least 10-20 minutes, but no more than 30 minutes for the blood to clot prior to centrifuging.
- TEMPERATURE: Never store blood in too warm an area; hot cars, hot sun, etc. Allowing blood to freeze in cold weather will also produce hemolysis.
- TRAUMA: Going through the vein, accessing a collapsed vein, or using a needle that is too small can all cause hemolysis. The needles provided by the labs are usually 21 or 22 gauge. If a 23 gauge is used, it is very possible that hemolysis may occur. Only use a smaller needle when absolutely necessary. When doing finger sticks, DBS, etc., squeezing the finger is the main cause of hemolysis.
- Lipemia: Lipemia is defined as an abnormal amount of fat in the blood. This is usually caused by the patient not fasting.
2. Ensure that all tubes are properly labeled. In accordance with regulatory requirements, all tubes must have two identifiers that match the laboratory consent or requisition. Unlabeled tubes cannot be processed by the laboratory.
- First identifier:
- The tubes in the insurance kit, except one urine tube, are pre-labeled with a barcode that matches the laboratory consent. The security seal from the bottom of the laboratory consent will be applied to the unlabeled urine tube to establish chain of custody. Verify that the number on the tubes matches the laboratory consent.
- Other kits – apply a barcode label found at the bottom of the laboratory consent or requisition to each tube.
- Second identifier:
- Print the patient/donor full first name and full last name on the barcode label on the tubes. Initials are not acceptable.
Procedure for Specific Specimen Collection
Upper Respiratory Tract
This section describes procedures for obtaining culture specimens from the nasopharyngeal area and the throat.
- A nasopharyngeal culture is obtained by inserting a thin sterile swab gently through the nose to touch the pharynx; gently rotate and remove.
- A throat culture is obtained by introducing a sterile swab into the mouth. Use a tongue blade to avoid contaminating the specimen with oral secretions. Firmly swab both tonsilar fossae, posterior pharynx, and any inflamed or ulcerated areas.
Lower Respiratory Tract Sputum
This section discusses sputum cultures, including such alternatives as induced sputum, tracheal aspiration, and bronchial washings.
- Rinsing the mouth with saline or water (but not mouthwash) may reduce contamination with normal oropharyngeal flora.
- Encourage deep cough with expectoration of the sputum into a sterile specimen collection cup that is labeled with the patient’s name and second patient identifier.
- Do not send saliva (spit) for culture.
- When the patient is unable to cough productively, notify the physician. An alternative method may be ordered, such as:
- Induced sputum. This is done by a respiratory therapist on the orders of the physician. Involuntary deep coughing is induced by irritation.
- Tracheal aspiration. The trachea is gently irritated with a small lumen suction catheter, which causes deep, productive coughing. Also, the specimen may be aspirated with a syringe.
- Bronchial washings. These are done by the physician in the operating room at the time of bronchoscopic examination.
- A small amount of sputum is all that is required, but it must be sputum and not oral secretions.
QuantiFERON®-TB Gold Plus
Blood Collection & Transport Instructions
24 hours prior collection, place foil pouch and cold pack in freezer.
Blood Collection:
- Label lithium-heparin tube (green top with black ring) with integrated label from requisition. Include first and last name on label. IMPORTANT: Tubes should be at room temperature (17-25 degrees C) at the time of blood collection.
- Fill the lithium-heparin blood collection tube (minimum volume of 6 mL) and gently mix by inverting the tube several times to dissolve the heparin. Avoid vigorous shaking to avoid hemolysis of cells. Do not centrifuge or transfer. Sample volume of less than 6 mL of blood may hamper ability to test.
Shipping:
- Prior to refrigeration, blood drawn into a lithium-heparin tube must be held at room temperature (17-25 degrees C) between 15 minutes and 3 hours after collection.
- Ship the lithium-heparin tube to the testing laboratory refrigerated at 2-8 degrees C. Insert tube and clinical requisition inside biohazard bag. Place biohazard bag inside popup box (labeled “Exempt Human Specimen”). Insert popup box and frozen cold pack into the foil insulated pouch. Place foil insulated pouch into FedEx Clinical Pak. Affix FedEx airbill and contact FedEx for shipping arrangements.
Notes:
Blood drawn into a lithium-heparin tube for TB testing is stable (2-8 degrees C) for 16 to 48 hours prior to testing by the laboratory. Due to the shipping and stability issues with this test, samples should only be collected Monday-Thursday. Ship same day as collection. Do not collect samples the day before a holiday. Cold packs and foil pouches will need to be placed in freezer at least overnight, prior to use, to allow adequate freeze time before shipping.
Specimens of Wound Exudate
Follow these steps for using a sterile transport swab in collecting wound exudate specimens.
- Gently cleanse the area, using dry, sterile gauze to remove any contaminants.
- Using a sterile red-stopper swab culture collection system, introduce deeply enough to obtain a moist specimen; replace the swab in the container. Do not break the container.
- Store at room temperature.
Stool for Culture
When collecting stool specimens, follow these guidelines.
- A small amount is all that is required, about the size of a walnut. If several different types of cultures are requested, submit a walnut-sized sample for each. Place the specimen in transport medium or in a sterile leakproof container.
- When stool cultures are not readily obtainable, rectal swabs are acceptable; however, it must be indicated whether the specimen is a stool or a rectal swab.
Use of Sterile Swab (Red-Stopper) Collection Kit
The swab system is guaranteed sterile until the seal is broken. Directions for use:
- Peel open and remove the swab from the package.
- Remove the cap/swab stick from the tube.
- Collect the appropriate specimen and put the cap/swab into the tube. Push the cap to bring the swab into contact with the transport medium.
- Print the patient’s name, second patient identifier and the culture site on the specimen tube.
- Place the specimen in a zip-lock bag and put the completed test request form in the side pouch
- Store it at room temperature.
- Send specimen to the laboratory