


.png?width=300&name=crl_purple_dots_bg_med%20(2).png)
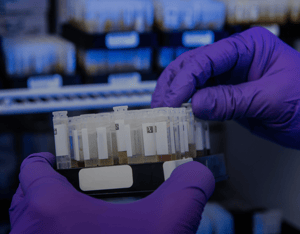
Oral Fluid Collection
CRL offers a comprehensive test menu ranging from routine laboratory services to the latest in molecular testing. We continually advance our test menu, provide customizations, and hold ourselves to the highest of quality and support standards, uniquely positioning our partners to achieve the best possible outcomes.
- Oral Fluid Collection
- Documentation
- Collection
- Shipping Prep
- Ship Sample
Oral Fluid Collection
Each kit contains:
- Oral collection device.
- Authorization Form with Tamper Evident Tape (to be signed by applicant/donor).
- Subject Information Pamphlet, if required.
- Shipping bag/chain of custody bag with absorbent pad.
- Pre-addressed & pre-paid shipping bag or other provided shipping materials.
An Oral collection device, such as Epitope’s OraSure, consists of a Collection Pad (looks like a flat toothbrush) and a Specimen Vial. The vial contains a blue, non-toxic liquid which preserves the specimen during shipment to the laboratory.
Documenting Your Collection
- Carefully explain each step of the procedure to the proposed insured prior to collecting the specimen.
- Complete the Authorization Form (be sure to indicate the insurance company).
- Have the proposed read, sign, and date the Consent section of the Authorization Form.
- When collecting specimens for HIV testing, provide the insured with the pamphlet entitled Subject Information.
Collect the Specimen
- Open the outer package to access the Collection Pad.
- Carefully open the individually packaged Collection Pad. Be sure to peel open the packaging far enough to sufficiently expose the pad to allow for easy removal.
- Offer the Collection Pad, handle end first, to the proposed insured, instructing them to remove the Collection Pad by grasping the handle.
- Instruct the proposed insured to place the pad portion between their lower cheek and gum, and to gently rub back and forth until the pad is moist.
- Instruct the proposed to leave the pad in their mouth. Keep track of the time the pad is in their mouth.
- The pad must stay in the proposed insured’s mouth at least two minutes and no longer than five minutes.
- While timing the two minutes, remove the Specimen Vial from the outer pouch. Write the date, proposed insured’s name, and their social security or driver license number on the specimen vial.
Prepare Specimen for Shipping
- Holding the vial upright, with the tip pointed down, carefully remove the cap from the vial using a rocking motion.
- After two minutes, ask the proposed insured to remove the Collection Pad from their mouth.
- Insert the Collection Pad into the vial while holding the handle.
- Push the Pad all the way to the bottom of the vial.
- Ask the proposed insured to bend the handle against the inner lip of the vial until the upper half of the nylon handle breaks off.
- Replace the cap, making sure you hear the snap that means the cap is properly sealed in the vial.
- Secure the Sample
- Have the proposed insured initial and date the Tamper-Evident Tape.
- Initial and date the tape yourself.
- Carefully place the Tamper-Evident Tape over the vial cap and avoid covering the identification section of the Specimen Vial
- Be sure to protect the vial from excessive temperatures. ORAL FLUID collections should be protected from temperatures over 98 degrees F.
Ship the Sample to the Laboratory
- Wrap the absorbent pad around the specimen vial to absorb any leakage.
- Place the specimen vial and absorbent pad in the specimen bag/chain of custody bag.
- Verify all information is complete on the Authorization Form AND that the proposed insured/donor has signed the Chain-of-Custody section of the Authorization Form.
- Sign and date the collector portion of the Chain-of-Custody section of the Authorization Form.
- Place the top copy (original) of the Authorization Form in the shipping bag/chain of custody bag.
- Place specimen bag in the shipping bag/chain of custody bag.
- Seal the shipping bag/chain of custody bag and send to the laboratory 24 hours. Sample must be received within 20 days of collection.
- Distribute the remaining copies of the Authorization Form as noted at the bottom of the form.